Note:
Please make sure you have completed the full installation process before continuing.
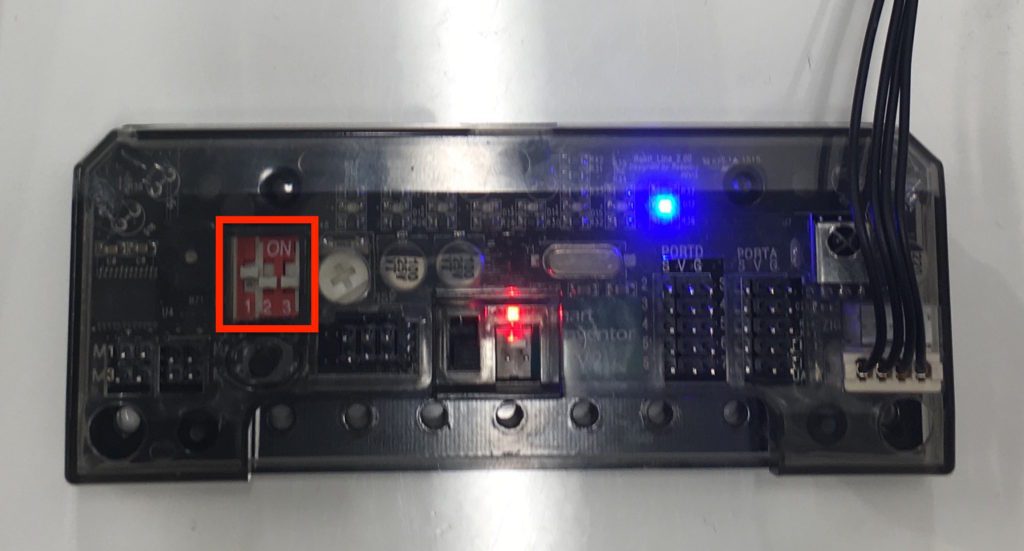
Step 1: Set the smart inventor board to upload mode
Flip “dipswitch 1” up and connect the smart inventor board to the computer, see attached image. This will prompt the blue led on the far right to flash. If the blue light is not flashing repeat this step. The download cable should connect to the lower right position on the board.
Step 2: Open the Arduino IDE and Select the Sketch that you want to download to the Board
Open the Arduino IDE, and open the sketch that you would like to download to the board.
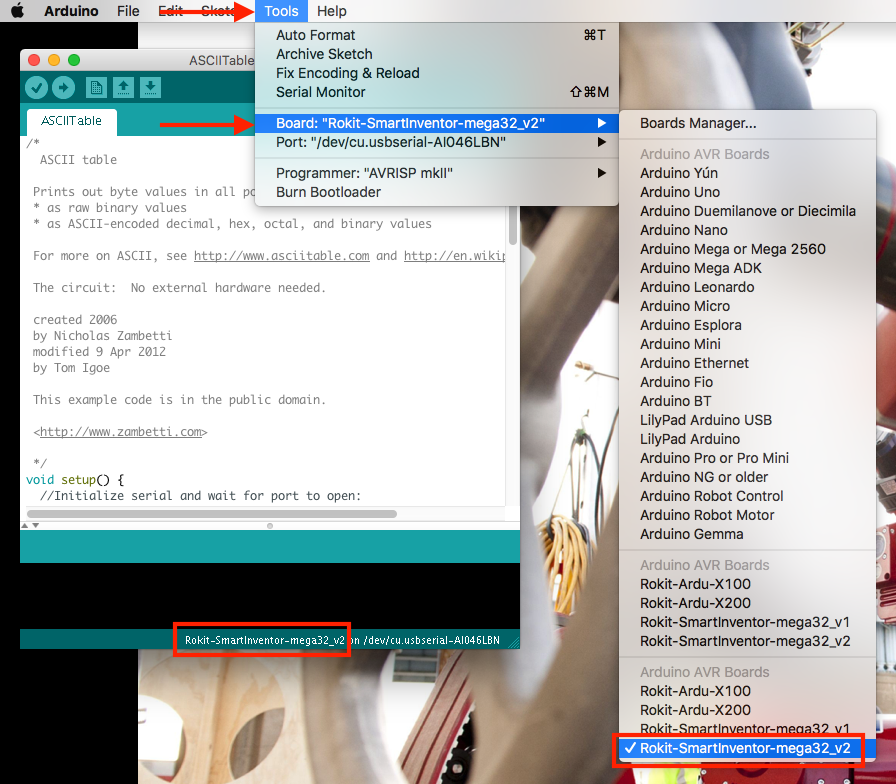
Step 3: Select the proper board
Once you select the code ensure that you select the correct board in Arduino. This is done by clicking on the tools tab, under board, select the appropriate board that you are using.
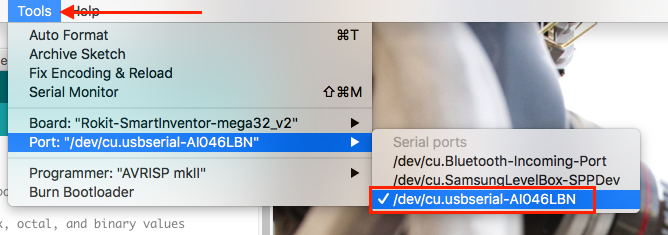
Step 4: Select the appropriate serial port connected to the Smart Inventor Board
FTDI Instructions (FTDI cables will have a micro USB in the Kit)
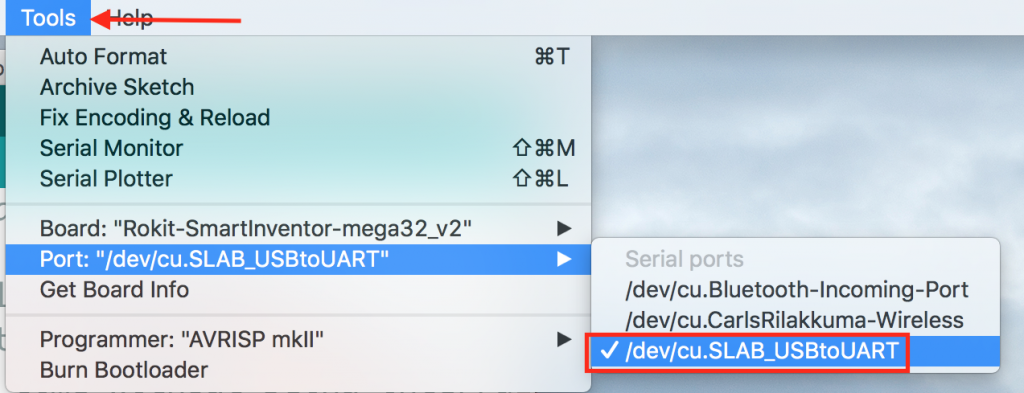
CP210X Instructions(CP210x cables have the mini USB cable in their kit)
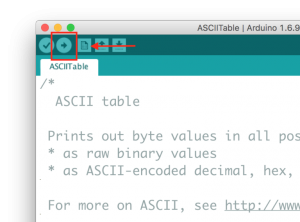
Step 5: Upload the desired sketch by clicking on the arrow featured in the following image
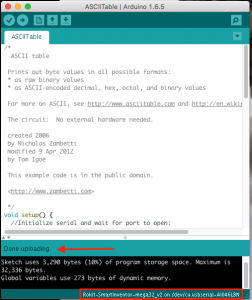
Once the file completely uploads the Arduino IDE will display “Done uploading” in the bottom left
Step 6: Flip dip switch 1 to initialize the downloaded program
